This post could contain affiliate links or be sponsored which means I earn from advertising. Also as an Amazon Associate I earn from qualifying purchases. More details here.
Have you already read a gel nail polish review somewhere else? Well I betcha it’s not as good as this gel nail polish review! *wink* I love nail art and trying out new designs. I’ve talked about this before. What I haven’t talked about is my frustrations when I put so much time into painting cute designs on my nails only to have them chip the next day or even that day. With two little ones running around I’ve just given up on trying new designs and doing a solid color because I’m tired of giving up the time to have to ruined so soon after. I had been toying with the idea of trying a gel nail at home. I got acrylics done once when I was like 15 and I didn’t like how hard they felt and the damage they did to my nails. My nails are prone to peeling, so when my pink nail broke and two others chipped in the same day I’d had enough and decided to dive in and give “at home” gel nails a try. I’m going to share the process, what I liked and didn’t like.
Here are my nails before I started… Peeling, chipped, cracks, and just so so frustrating! (Poor right hand pinky finger, met it’s demise!)

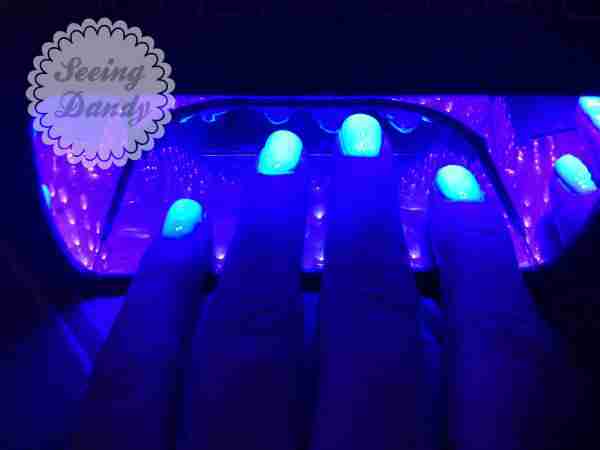
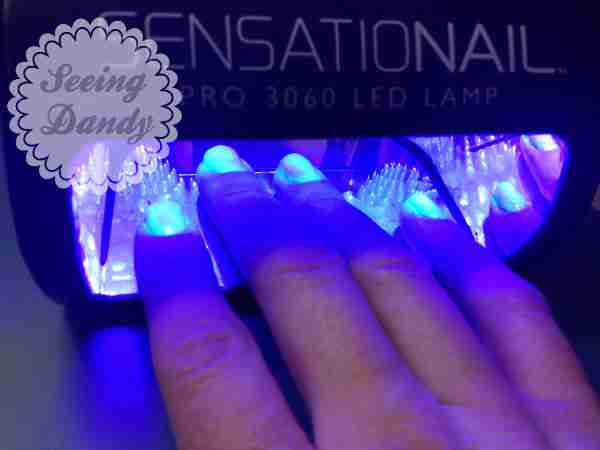
There are 5 whole steps to doing gel nails. My kit, Sensationail uses an LED light to cure the polish. After you’ve removed any previous nail polish the first step is to buff the tops of your nails using the included nail file, then clean them with the rubbing alcohol included to remove any dust.
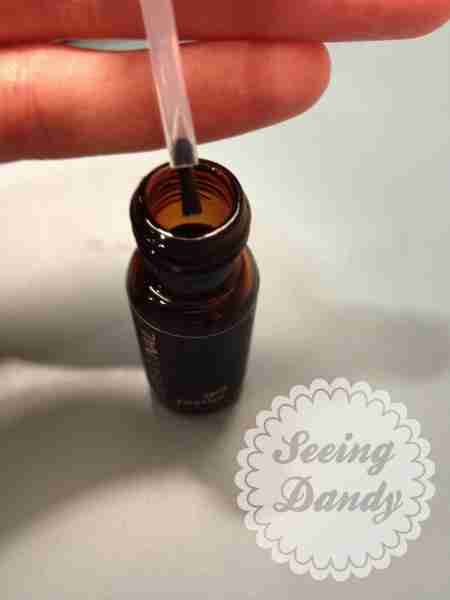
The second step is to apply the primer to your nails. I did this step wrong. I didn’t know I did it wrong until the second time I did my nails. I’ll get to that at the end of the post 😀 You apply the primer, which has the littlest brush I’ve ever seen, and about 30 second later you’re ready for your next step. But first, look at this brush!
Step number three you apply one coat of the base/top coat and cure it in the light for 30 seconds. They were totally smart and have the light beep after 30 seconds and shut off after 60. So helpful! I was all set up to use a stop watch, it would’ve been tricky, I’m glad I didn’t need to!
I accidentally touched one of my nails and even when it’s cured it still has a sticky kind of surface. It’s really good at catching lint, just make sure there’s nothing there before you move onto your next step. But look how shiny they are! I think you could just stop here if you wanted and have shiny nails that don’t stop!
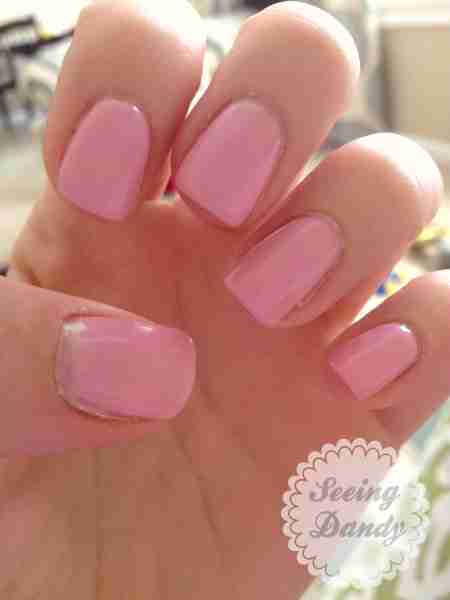
Now comes time for step 4, applying your color. My kit came with a baby pink color. I applied one coat and cured it for 60 seconds, or when the light shut off. I wasn’t happy with how thin the coat was so I did a second coat.
Step five is to apply a top coat and cure it for 30 more seconds. I you can see where you messed up in the light, or where you missed some color. Everything will be a solid white, if it’s not just add a bit where it needs and stick it back in for the 30 more seconds. You can’t over cure it!

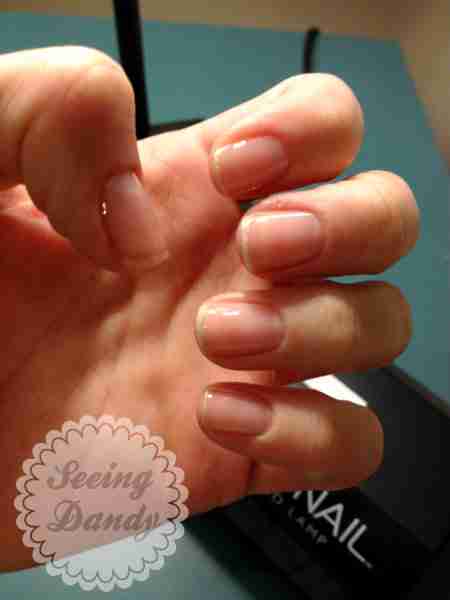
I was pretty worried when I realized that my nails were kind of sticky, then I saw the final “step” is to take the alcohol wipe and rub it off. It comes off and leaves behind a totally shiny manicure!

They are pretty thick compared to just plain nail polish. They’re not as thick as acrylics though. They also have a flexibility to them, you can still bend your nail, it won’t crack. But the thickness depends on how thick you apply your coats too.

They whole claim to these is that you can wear them for up to 2 weeks, because that’s when you’ll see the nail growth. So I wanted to check to see if that was really legit or not. Here’s 3 days after application. NO CHIPS! If I would’ve done regular polish I would have at least one chip by now.

Here’s 7 days after application. You can see at my nail bed that it’s starting to lift, however I did apply too much there. But otherwise no cracking on the edges, or rubbing off, or any other effects.
The next morning in the shower while I was washing my hair I felt something tug on my thumb, and this is what I saw.

I removed the rest that day. The removal process was tedious, but when I gave it the right amount of time to soak my nails were in the same condition as when I applied the polish, no better or worse.
Pros and Cons, let’s start with cons.
Cons:
- A bit pricey to start off, to get the lamp and other basics
- chipped after 7 days but remember what I said earlier, about how I messed up on the primer step? Well here’s what happened. You’re supposed to apply the primer and let it set for like 20 seconds, somewhere I thought I read I had to wait until it dried. So I tried waiting until it dried. Here’s a hint, it DOESN’T dry! In the process of trying to “let” it dry I ended up rubbing off a good amount of the primer, which in return didn’t let the gel polish adhere to my nail. The second time I tried it out, with a new color it lasted the full 2 weeks. When I went to take it off it was because I was tired of the color not because it had chipped. It was stuck on and probably would’ve stayed another week!
- It lasts so long. This can be a down side if you like to change you’re polish frequently.
- There aren’t as many color choices as regular polish
Pros:
- It’s last for so long! It doesn’t chip! I can keep a color I love for 2 whole weeks!
- It stays shiny THE WHOLE TIME! Usually with a top coat if hair spray hits it the shine dulls, this does not dull until you’re near the 2 week mark
- My nails aren’t breaking any more because it’s so protective
- You can do it at home, and not have to go to a salon
- If done right, the removal process doesn’t tare up your nails and leaves them the way you had them, unlike acrylics.
- Once it’s been cured you can clean, wash you hair, sleep on your nails and you won’t smudge you maincure. I can’t tell you how many times I thought my nails were dry only to wake up with hair lines on my nail or get out of the shower and the color has rubbed back.
- The time is well spent for the length the manicure lasts. I don’t have much time to give just myself with my boys, so if I’m going to take the time to pamper myself I want it to last longer than 3 days.
All in all I like it! I’ve since done my toes twice, which really you could probably get that pedicure to last a month, and my nails today for the third time. Each time I’m learning how to apply more precise coats, and not get any color under my nails. If you do it stays and feels like you got super glue under there. I recommend doing them with a higher end brand than your run of the mill knock off. I think the primer is the key step to getting it to last for as long as possible.
What do YOU think about this gel nail polish review?
Do you have any questions about gel nails!? I can try to answer them, especially about this brand.
Jami
P.S. I have a theory that you should be able to sandwich regular polish, and any design you wish, between the primer base and top coat and still get the same length results. I think I’ll try that next. Because if so! How awesome would that be that you could spend the time on your cute design and have it last for 2 weeks!? I’ll let you know 😀
Recommended Posts


Seeing Dandy
Author at Seeing Dandy Blog
This post could contain affiliate links or be sponsored which means I earn from advertising. Also as an Amazon Associate I earn from qualifying purchases. More details here.